vue-cli

webpack-vue

vue-cli官方脚手架安装

安装官方脚手架(https://github.com/vuejs-templates/webpack)

1
2
3
4
5
6
7
8

npm install -g vue-cli

vue init webpack my-project

cd my-project

npm install

开发环境运行

1
npm run dev

生产环境准备生成dist

1
npm run build

官方脚手架支持单元测试

1
npm run unit

这个模板是Vue 2.0兼容。对于Vue 1.x,请使用以下命令:

1
vue init webpack#1.0 my-project

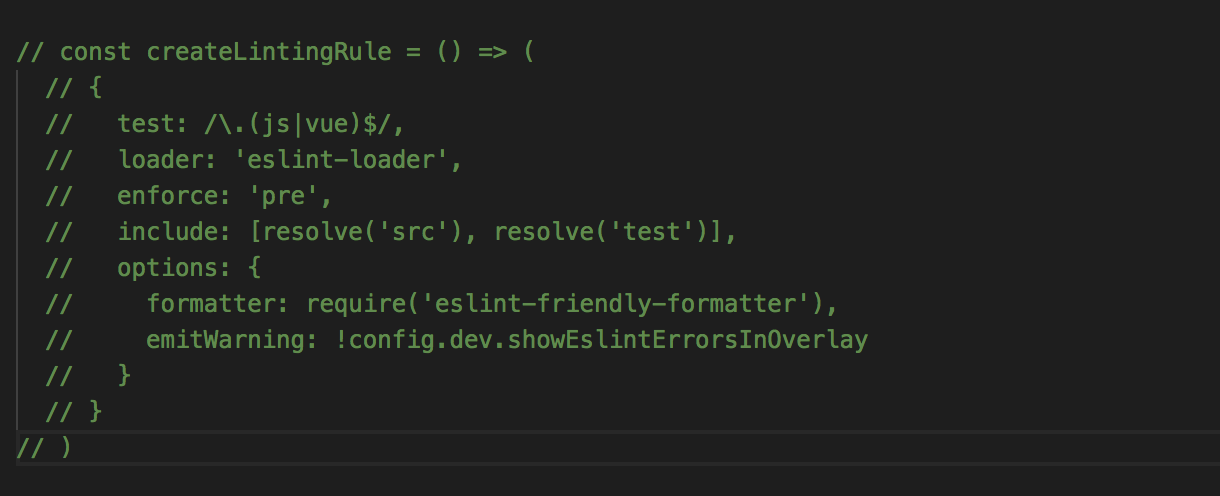
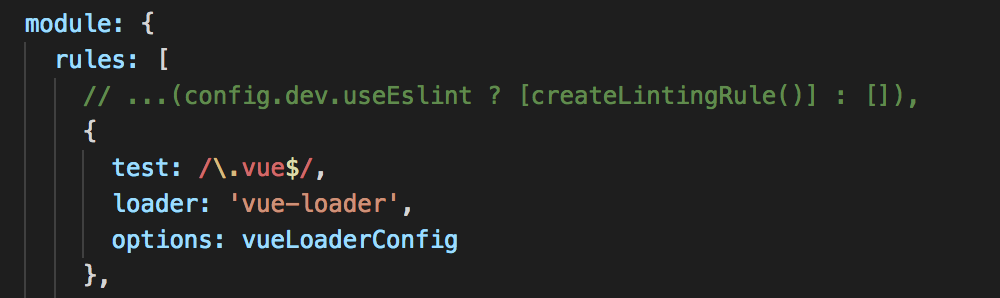
官方脚手架中用到eslint,若不需要使用在项目初始化时执行到选择是否用eslint时输入N再回车
若项目已经初始化完毕需要关闭找到/build/webpack.base.conf.js 在其中注释掉eslint

imgimg
imgimg

Vue-cli proxyTable 解决开发环境的跨域问题

在Vue-cli项目中webpack.dev.conf.js中devServer是这样的

1
2
3
4
5
6
7
8
9
10
11
12
13
14
15
16
17
18
devServer: {
clientLogLevel: 'warning',
historyApiFallback: true,
hot: true,
compress: true,
host: HOST || config.dev.host,
port: PORT || config.dev.port,
open: config.dev.autoOpenBrowser,
overlay: config.dev.errorOverlay
? { warnings: false, errors: true }
: false,
publicPath: config.dev.assetsPublicPath,
proxy: config.dev.proxyTable,
quiet: true, // necessary for FriendlyErrorsPlugin
watchOptions: {
poll: config.dev.poll,
}
}

其中proxy是设置代理的,这里的代理指向config/index.js中的proxyTable,所以说在Vue-cli官方脚手架项目中设置代理是在config/index.js中设置

在config/index.js中的dev是这样的

1
2
3
4
5
6
7
8
9
10
11
12
13
14
15
16
17
18
19
20
21
22
23
24
25
26
27
28
29
30
31
32
33
34
35
36
37
38
39
40
41
42
dev: {

// Paths
assetsSubDirectory: 'static',
assetsPublicPath: '/',
proxyTable: {},

// Various Dev Server settings
host: 'localhost', // can be overwritten by process.env.HOST
port: 8080, // can be overwritten by process.env.PORT, if port is in use, a free one will be determined
autoOpenBrowser: false,
errorOverlay: true,
notifyOnErrors: true,
poll: false, // https://webpack.js.org/configuration/dev-server/#devserver-watchoptions-

// Use Eslint Loader?
// If true, your code will be linted during bundling and
// linting errors and warnings will be shown in the console.
useEslint: true,
// If true, eslint errors and warnings will also be shown in the error overlay
// in the browser.
showEslintErrorsInOverlay: false,

/**
* Source Maps
*/

// https://webpack.js.org/configuration/devtool/#development
devtool: 'eval-source-map',

// If you have problems debugging vue-files in devtools,
// set this to false - it *may* help
// https://vue-loader.vuejs.org/en/options.html#cachebusting
cacheBusting: true,

// CSS Sourcemaps off by default because relative paths are "buggy"
// with this option, according to the CSS-Loader README
// (https://github.com/webpack/css-loader#sourcemaps)
// In our experience, they generally work as expected,
// just be aware of this issue when enabling this option.
cssSourceMap: false,
}

因为webpack.dev.conf.js中的proxy指向config/index.js中的proxyTable
所以我们设置代理需要在proxyTable中设置

1
2
3
4
5
6
7
8
9
10
    
proxyTable: {
'/apis': { //将www.exaple.com印射为/apis
target: 'https://www.exaple.com', // 接口域名
changeOrigin: true, //是否跨域
pathRewrite: {
'^/apis': '' //需要rewrite的,
}
}
}

vue-cli引入scss和less

vue-cli中已经内置配置好了sass 以及lass的配置。如果需要的话直接下载两个模块就可以了,webpack它会根据 lang 属性自动用适当的加载器去处理。

如果需要使用sass,则安装:

1
2
npm install node-sass --save-dev  
npm install sass-loader --save-dev

sass的内联写法:

1
2
3
<style lang="sass" scoped>  
//sass样式
</style>

sass的引用写法:

1
<style lang="sass" src="./index.sass"></style>

如果需要使用less,则安装:

1
2
npm install less --save-dev  
npm install less-loader --save-dev

less的内联写法:

1
2
3
<style lang="less" scoped>  
//less样式
</style>

less的引用写法:

1
<style lang="less" src="./index.less"></style>

Powered by Hexo and Hexo-theme-hiker

Copyright © 2013 - 2018 lrzeblog All Rights Reserved.

访客数 : | 访问量 :